
What's in the box
- Clover Station device (touchscreen POS)
- Power adapter
- Power cable
- Receipt printer
- Power adapter
- Printer cable
- Clover Station Solo Quick Start Guide (PDF)
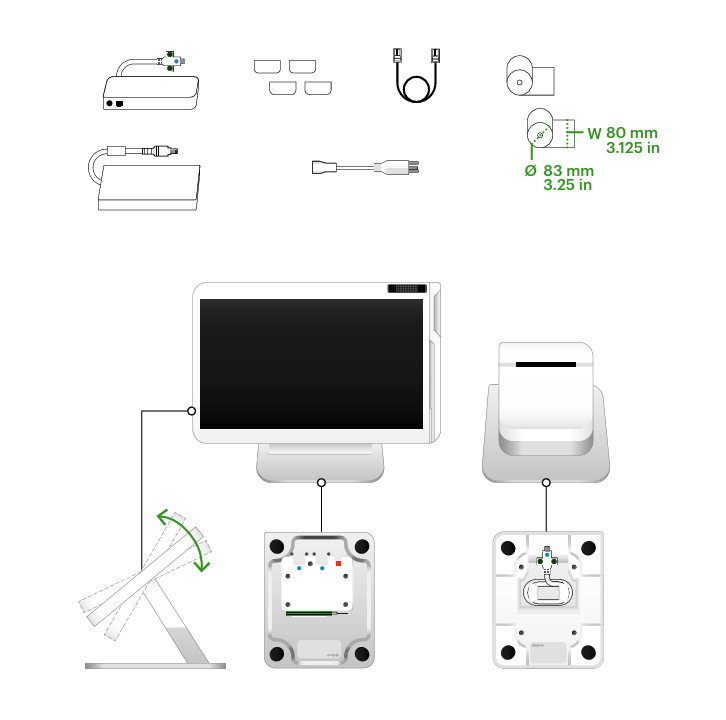
Assemble your Station Solo
Put together your Station Solo by connecting all the parts. After all the parts are connected, you can plug it in.
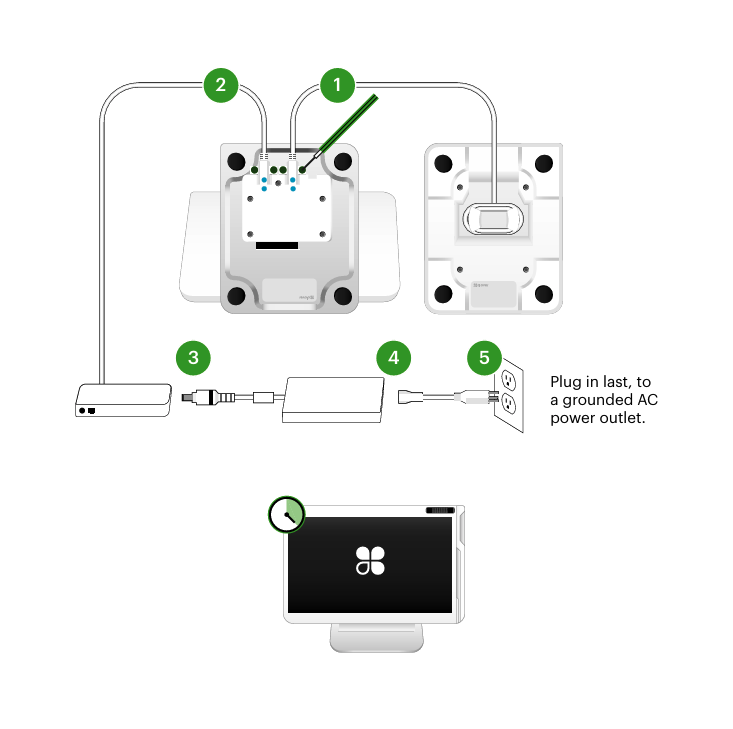
Connect the power
- Connect the power cable to the port on the back of the Clover Solo device.
- Connect the other end of the power cable to the power adapter.
- Plug the adapter cable into the power adapter.
- Plug the power adapter into a grounded AC power outlet.
Activate your Station Solo
Before activating the Solo, make sure your internet is set up. We recommend using Ethernet because it provides the most stable connection and lets you quickly connect all your devices and accessories to the same network. If using WiFi, it must have a security level of WPA or WPA2. Your network needs to be a closed, password-protected network to process payment transactions.
The first time you turn on the Solo, you’ll be guided through steps to activate and set up the device.
- On the display, choose your language.
- If the Ethernet cable is plugged in, you’ll automatically connect to the internet that way. If you want to connect using WiFI, enter your WiFi network information and disconnect the Ethernet cable if applicable.
- When you’re prompted to enter a device activation code, follow the instructions on the screen to retrieve it. Once you enter the code, Clover will install the latest apps for your device.
- Continue through the remaining screens to complete the device setup process.
Set up the printer
- Open the top of the printer and the green latch to release the printer head.
- On the display, tap Continue.
- Install the thermal paper with the edge of the roll following the inside top of the compartment and out of the slot.
- Close the printer door until it clicks.
Set a passcode to secure your device
During activation, you’ll have the opportunity to set a passcode. If you already have an admin account, the activation process will not include this step.
Setting a passcode adds an extra layer of security. Employees can have individual passcodes, which makes it easy to track their sales and attendance. You can set passcodes on the dashboard or in the Employees app on the device.